Easy Scalloped Crochet Coaster Pattern: A Beginner-Friendly Tutorial
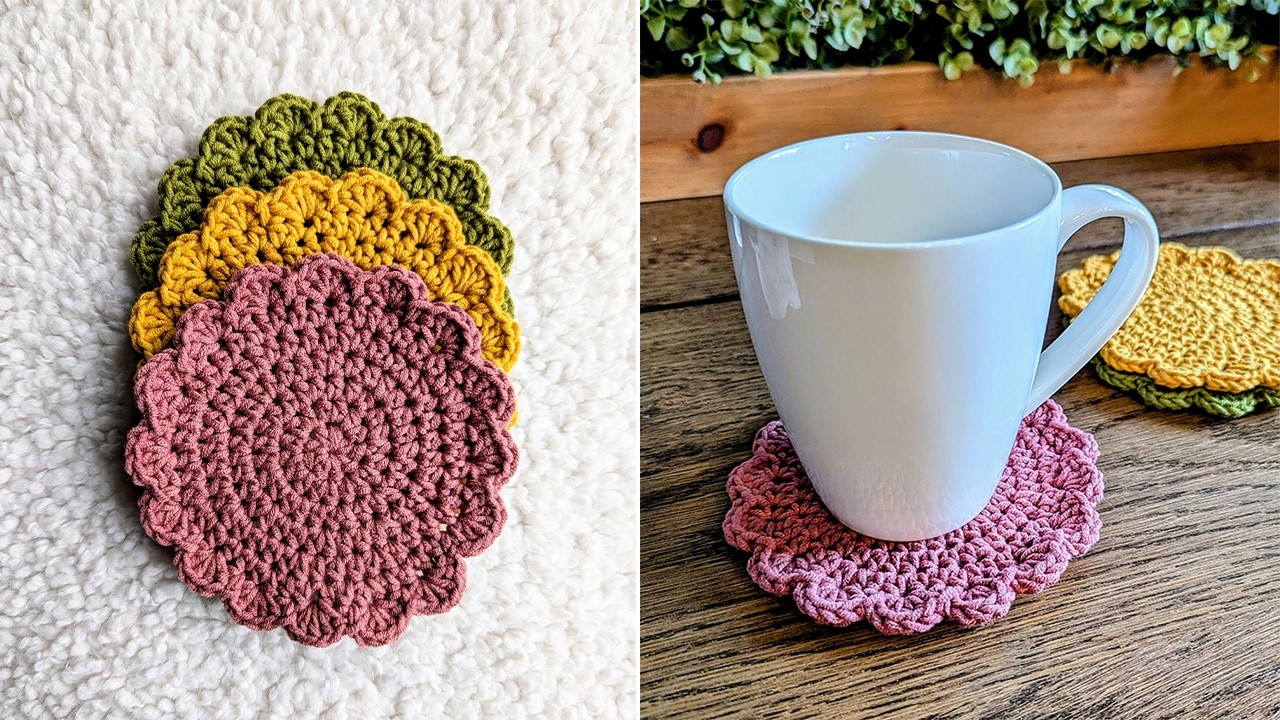
Are you looking for a quick, satisfying project that adds a touch of handmade charm to your home? These Easy Scalloped Crochet Coasters are the perfect solution! Whether you’re a complete beginner or a seasoned pro looking for a “palette cleanser” project, this tutorial will guide you through every step to create these beautiful, functional pieces of home decor.
Why You’ll Love This Project
- Beginner-Friendly: Uses only basic stitches like the half double crochet (hdc) and single crochet (sc).
- Quick to Make: You can whip up a full set in just one afternoon!
- Great for Gifts: These coasters make thoughtful, personalized gifts for housewarmings, birthdays, or holidays.
- Scrap-Friendly: A perfect way to use up those leftover bits of cotton yarn.
Crochet Abbreviation Chart
To make this pattern easy to follow, we use standard crochet abbreviations. Refer to this chart if you’re unsure of any terms:
| Abbreviation | Description |
|---|---|
| beg | begin/beginning |
| ch | chain stitch |
| ch-sp | chain space |
| dc | double crochet |
| hdc | half double crochet |
| inc | increase (2 stitches in the same stitch) |
| rep | repeat |
| rnd | round |
| sc | single crochet |
| sl st | slip stitch |
| st | stitch |
| yo | yarn over |
Materials Needed
Before we beg, gather the following supplies:
* Yarn: Medium weight (#4) cotton yarn. Cotton is best for coasters as it’s absorbent and heat-resistant.
* Hook: US size G (4.0 mm) crochet hook.
* Tools: Stitch marker, scissors, and a tapestry needle for weaving in ends.
Step-by-Step Pattern Instructions
The Base of the Coaster
We will work in continuous rounds. Use your stitch marker to mark the first st of each rnd.
To Begin: ch 2.
Round 1: Work 8 hdc into the 2nd ch from the hook. pm (place marker) in the first st. (Total: 8 sts)
Round 2: Work an inc in each st around. (Total: 16 sts)
Round 3: * inc in the first st, then 1 hdc in the next st. rep from * around. (Total: 24 sts)
Round 4: * inc in the first st, then 1 hdc in each of the next 2 sts. rep from * around. (Total: 32 sts)
Round 5: * inc in the first st, then 1 hdc in each of the next 3 sts. rep from * around. (Total: 40 sts)
Round 6: * inc in the first st, then 1 hdc in each of the next 4 sts. rep from * around. End the rnd by sl st to the first st of the next rnd. (Total: 48 sts)
The Scalloped Border
This is where the magic happens! The scalloped edge gives the coaster its signature “flower” look.
Round 7:
1. ch 1, then work 1 sc in the same st.
2. Skip the next st, work 5 hdc in the next st (this creates the scallop), skip the next st, sl st in the next st.
3. rep from * to * all the way around the coaster.
Assembly & Finishing Instructions
Once you’ve finished the last scallop, it’s time to tidy up your work:
- Fasten Off: Cut your yarn, leaving a tail of about 6 inches. Pull the tail through the last loop on your hook to secure it.
- Invisible Join (Optional): For a professional finish, use your tapestry needle to thread the tail through the first sc of the round and back into the center of the last sl st.
- Weave in Ends: Flip your coaster to the WS (wrong side). Use the tapestry needle to weave the yarn tail through the stitches on the back. Go back and forth at least three times to ensure it won’t come undone.
- Blocking: If your coaster is curling slightly, you can “steam block” it by lightly spraying it with water and pinning it flat until dry.
Congratulations! You’ve just created a beautiful scalloped crochet coaster. Make a few more in different colors to create a stunning set for your coffee table!
Tag us on Pinterest or Instagram with your finished projects—we’d love to see your Fiber Blooms creations!