
# How to Crochet Lily of the Valley: A Beginner-Friendly Tutorial
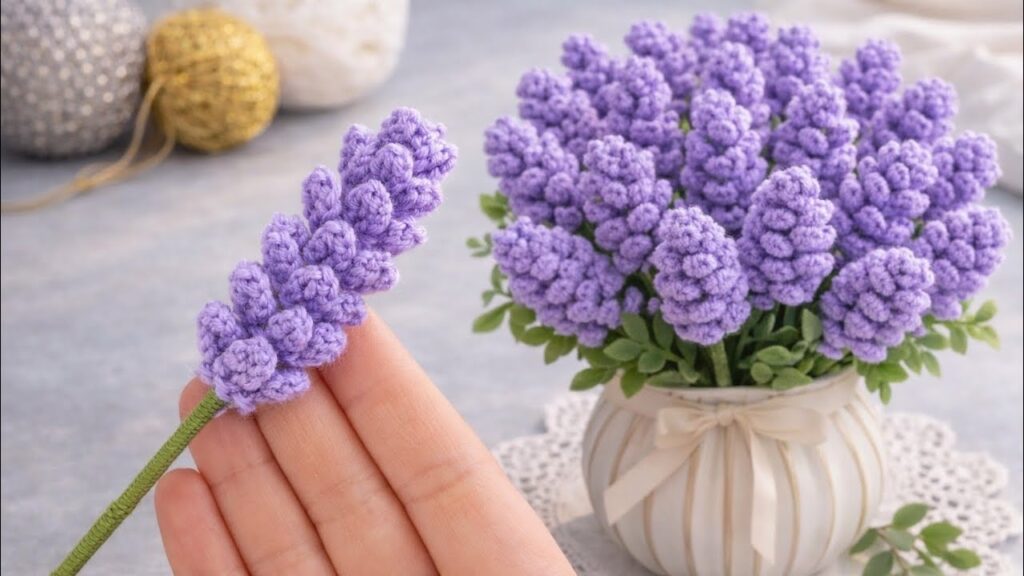
Welcome to a charming crochet journey where we’ll create the delicate and enchanting Lily of the Valley! Known for its tiny, bell-shaped flowers and fresh green leaves, this bloom symbolizes purity, happiness, and humility. Crocheting these beautiful flowers allows you to capture their ephemeral beauty in a lasting, handmade form. This tutorial is perfect for crocheters of all skill levels, especially beginners, as it breaks down each step into easy-to-follow instructions.
Crafting your own Lily of the Valley sprigs can add a touch of elegance to your home decor, make a thoughtful gift, or become a delightful addition to a larger floral arrangement. Let’s gather our materials and begin!
## Materials List
To create your exquisite crochet Lily of the Valley, you will need the following:
* **Yarn**:
* Thin crochet thread or lace-weight yarn in **White** for the bell flowers.
* Thin crochet thread or lace-weight yarn in **Green** for the leaves and stem wrapping.
* **Crochet Hook**: 2.20 mm (or a similar small hook to achieve tight stitches and a delicate finish).
* **Stem Base**: A thin wooden skewer or floral wire (approximately 8-10 inches long).
* **Adhesive**: Hot glue gun and glue sticks.
* **Scissors**: For trimming yarn ends.
* **Yarn Needle**: For weaving in any loose ends (optional, as most ends will be secured with glue).
## Stitch Abbreviations
This pattern uses standard US crochet terminology. Below is a summary of the abbreviations you’ll encounter in this tutorial:
| Abbreviation | Description |
| :———– | :———————————————– |
| **ch** | chain stitch |
| **hdc** | half double crochet |
| **sc** | single crochet |
| **sl st** | slip stitch |
| **st** | stitch |
| **yo** | yarn over |
## Pattern Instructions
Follow these detailed steps to crochet the components of your Lily of the Valley.
### Part 1: The Base Strip (White Yarn)
This strip forms the foundation for both the white bell flowers and the green calyx.
1. **Foundation**: Using your **white yarn**, create a slip knot and then chain **63 stitches (63 ch)**.
2. **Row 1**: Starting from the 3rd chain from your hook, work **one half double crochet (hdc)** into every stitch across the entire chain. You should have 61 hdc stitches. This creates a flat, sturdy strip.
### Part 2: The Ruffled Bell Flowers (White Yarn)
Continuing from the base strip, you will now create the delicate bell shapes.
1. **First Ruffle**: With the **white yarn** still attached, chain **6 (6 ch)**.
2. **Attach Ruffle**: Skip the next stitch on your hdc base strip, and then work a **single crochet (sc)** into the following stitch.
3. **Repeat for Bell Flowers**: Repeat the sequence `[Chain 6, skip 1 stitch, single crochet into the next stitch]` **35 times**. This will create 35 white ruffled loops that will form the bell flowers.
### Part 3: The Green Calyx/Leaves (Green Yarn)
Now, switch to green yarn to create the leafy base of the flower.
1. **Switch Yarn**: Cut the white yarn, leaving a small tail to secure later. Attach your **green yarn** to the next available stitch on the hdc base strip (after the last white sc).
2. **First Green Loop**: Chain **8 (8 ch)**.
3. **Attach Green Loop**: Skip the next stitch on the hdc base strip, and then work a **single crochet (sc)** into the following stitch.
4. **Repeat for Calyx**: Repeat the sequence `[Chain 8, skip 1 stitch, single crochet into the next stitch]` **25 times**. This will create 25 longer green loops that will form the calyx and small leaves around the base of the flower.
5. **Finish Off**: Once you reach the end of the hdc base strip, cut your green yarn, leaving a small tail, and pull it through the loop to secure.
## Assembly Instructions
Now that all your crocheted components are ready, let’s assemble your beautiful Lily of the Valley sprig.
1. **Prepare the Stem**: Take your wooden skewer or floral wire. Apply a small dot of hot glue to one end of the skewer.
2. **Start Rolling the Flower**: Take the **white end** of your crocheted strip (the end with the first 6-ch loop). Press the very beginning of this strip onto the glued tip of the skewer.
3. **Forming the Bell**: Carefully begin to roll the white section of the strip around the skewer. As you roll, apply small dots of hot glue along the *hdc base row* (not the loops themselves) to secure the strip to the skewer. Ensure the white ruffled loops are layered tightly and evenly to create a full, bell-shaped flower head.
4. **Adding the Green Calyx**: Continue rolling the strip until you reach the green section. Wrap these green loops around the bottom of the white flower head, securing with small dots of hot glue on the hdc base. This forms the natural-looking calyx and small leaves.
5. **Wrapping the Stem**: Once the entire crocheted strip is rolled and secured, take the remaining green yarn tail. Apply a thin line of hot glue to the skewer just below the flower head. Begin wrapping the green yarn tightly down the entire length of the skewer, covering it completely. This creates a neat, green stem.
6. **Secure Stem End**: Once the skewer is fully wrapped, secure the end of the green yarn with a final small dot of hot glue and trim any excess yarn.
7. **Final Shaping**: Gently adjust and fluff the white bell loops and green calyx loops with your fingers to achieve the desired shape and fullness.
## Beginner Tips for Success
* **Consistent Tension**: Maintaining even tension throughout your chaining and single crochet stitches is crucial for uniform loops and a professional finish.
* **Hook Size**: The 2.20 mm hook is recommended to ensure your stitches are tight and the bell flowers hold their delicate shape without being too floppy.
* **Strategic Gluing**: Apply hot glue sparingly and precisely to the hdc base strip, not directly onto the loops. This prevents the loops from becoming stiff and maintains their natural drape.
* **Tight Rolling**: When assembling, roll the crocheted strip as tightly as possible around the skewer, especially at the beginning. This ensures the flower is securely attached and doesn’t unravel.
* **Patience is Key**: Take your time with each step, especially during assembly. Crocheting is a relaxing craft, and rushing can lead to mistakes.
Enjoy your beautiful, handmade crochet Lily of the Valley! These charming sprigs are perfect for bouquets, corsages, or as elegant standalone decorations. Happy crocheting!