Crochet a Charming 3D Daisy Flower: Easy Step-by-Step Tutorial for Beginners
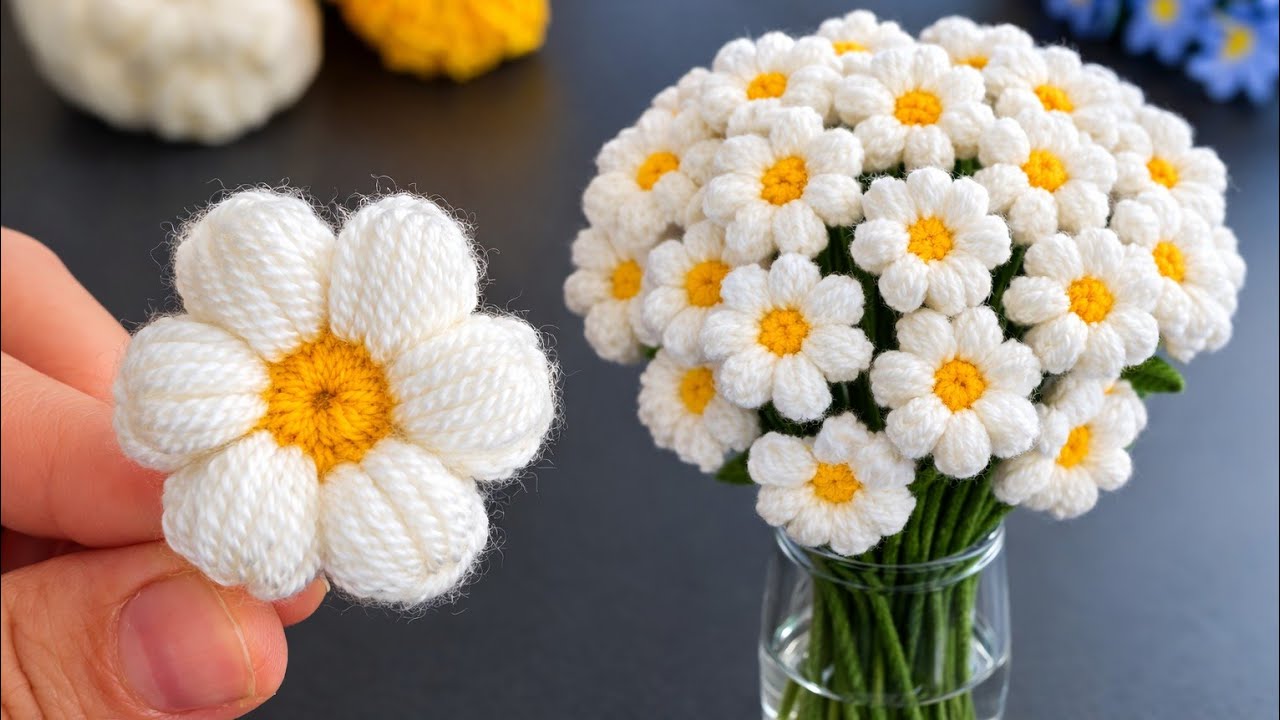
Welcome, crochet enthusiasts! Are you looking to add a touch of handmade charm to your crafts? This easy-to-follow tutorial will guide you through crocheting a beautiful 3D daisy flower, perfect for embellishing hats, blankets, or creating unique accessories. Even if you’re a beginner, our clear, step-by-step instructions and detailed outline will help you create these adorable puffy daisies with ease.
Abbreviations & Materials
Before we begin, let’s familiarize ourselves with the abbreviations used in this pattern and gather the necessary materials.
Abbreviations
| Abbreviation | Meaning |
|---|---|
| MR | Magic Ring |
| ST(s) | Stitch(es) |
| SL | Slip Stitch |
| SLST | Slip Stitch |
| CH | Chain |
| SC | Single Crochet |
| DC | Double Crochet |
| INC | Increase |
| BLO | Back Loop Only |
| FLO | Front Loop Only |
| FPDC | Front Post Double Crochet |
| BPDC | Back Post Double Crochet |
Materials
- Crochet Hook: 2.75mm
- Yarn: Medium-weight yarn in two colors (Yellow for the center, White for the petals)
- Scissors
Crochet Daisy Flower Outline
Here’s a quick overview of the steps we’ll be taking to create your 3D crochet daisy:
| Part | Step | Yarn Color | Stitches/Techniques |
|---|---|---|---|
| 1 | Create Magic Ring | Yellow | MR |
| 1 | Work Single Crochets into MR | Yellow | 12 SC |
| 1 | Close and Join Round | Yellow | Pull tail, SLST into first SC |
| 1 | Finish Off Center | Yellow | CH 1, cut yarn |
| 2 | Attach White Yarn | White | Insert hook, pull through white yarn |
| 2 | First Petal: Chain 3 | White | CH 3 |
| 2 | First Petal: 3 Loop Increase (St 1) | White | Yarn over, pull up loop 3 times in same ST |
| 2 | First Petal: 3 Loop Increase (St 2) | White | Yarn over, pull up loop 3 times in next ST |
| 2 | First Petal: Pull Through All Loops | White | Yarn over, pull through all loops on hook |
| 2 | First Petal: Chain 3 & Slip Stitch | White | CH 3, SLST into next ST on yellow center |
| 2 | Repeat for Remaining Petals | White | Repeat steps for 5 more petals (total 6 petals) |
| 3 | Secure Ends | N/A | Cut yarn, weave in/tie off loose ends |
| 3 | Final Shaping | N/A | Adjust petals for plump, even spacing |
Step-by-Step Crochet Instructions
Follow these detailed instructions to crochet your beautiful 3D daisy flower.
Part 1: The Flower Center (Yellow Yarn)
- Create a Magic Ring (MR): With your yellow yarn, form a magic ring. This creates a tight center for your flower.
- Work 12 Single Crochets (SC) into the MR: Insert your hook into the magic ring, yarn over, pull up a loop, yarn over, and pull through both loops on your hook. Repeat this 11 more times until you have 12 SC stitches inside the ring.
- Close the Ring and Join: Gently pull the yarn tail of the magic ring to tighten the center hole. Then, insert your hook into the first SC stitch you made and complete a Slip Stitch (SLST) to join the round.
- Finish Off: Chain 1 (CH 1) to secure your work, then cut the yellow yarn, leaving a small tail. Pull the tail completely through the loop on your hook to fasten it.
Part 2: The Petals (White Yarn)
- Attach White Yarn: Take your white yarn. Insert your hook into any stitch around the yellow center. Yarn over with the white yarn and pull it through the stitch, then pull it through the loop on your hook to attach.
- First Petal – Chain 3 (CH 3): Chain 3 stitches. This forms the initial height for your petal.
- First Petal – 3 Loop Increase in Same Stitch: In the same stitch where you attached the white yarn, yarn over, insert your hook, pull up a loop. Repeat this two more times in the same stitch, keeping all the loops on your hook. You should have 7 loops on your hook (1 initial loop + 3 from first increase + 3 from second increase).
- First Petal – 3 Loop Increase in Next Stitch: Now, move to the next stitch on the yellow center. Yarn over, insert your hook, pull up a loop. Repeat this two more times in this new stitch, keeping all loops on your hook. You should now have 13 loops on your hook.
- First Petal – Pull Through All Loops: Yarn over and carefully pull the yarn through all 13 loops on your hook. This creates the puffy effect of the petal.
- First Petal – Chain 3 (CH 3) & Slip Stitch (SLST): Chain 3 stitches, then insert your hook into the next stitch on the yellow center and complete a SLST. This secures the petal and prepares you for the next one.
- Repeat for Remaining Petals: Continue repeating steps 2 through 6 for the remaining 5 petals. You will have a total of 6 petals around your daisy center.
Part 3: Finishing Touches
- Secure Ends: Once all 6 petals are complete, cut the white yarn, leaving a tail. Pull the tail through the loop on your hook to fasten. Use your scissors or a yarn needle to weave in any loose ends neatly at the back of your daisy.
- Final Shaping: Gently adjust and fluff your petals to ensure they are plump, evenly spaced, and form a beautiful 3D daisy shape.
Congratulations! You’ve successfully crocheted a charming 3D daisy flower. These versatile little blooms can be used in countless ways to add a handmade touch to your projects. Enjoy your beautiful creation!